File:EGS Ballachulish Fig 09A.jpg: Difference between revisions
Jump to navigation
Jump to search
No edit summary |
No edit summary |
||
| (3 intermediate revisions by the same user not shown) | |||
| Line 1: | Line 1: | ||
== Summary == | == Summary == | ||
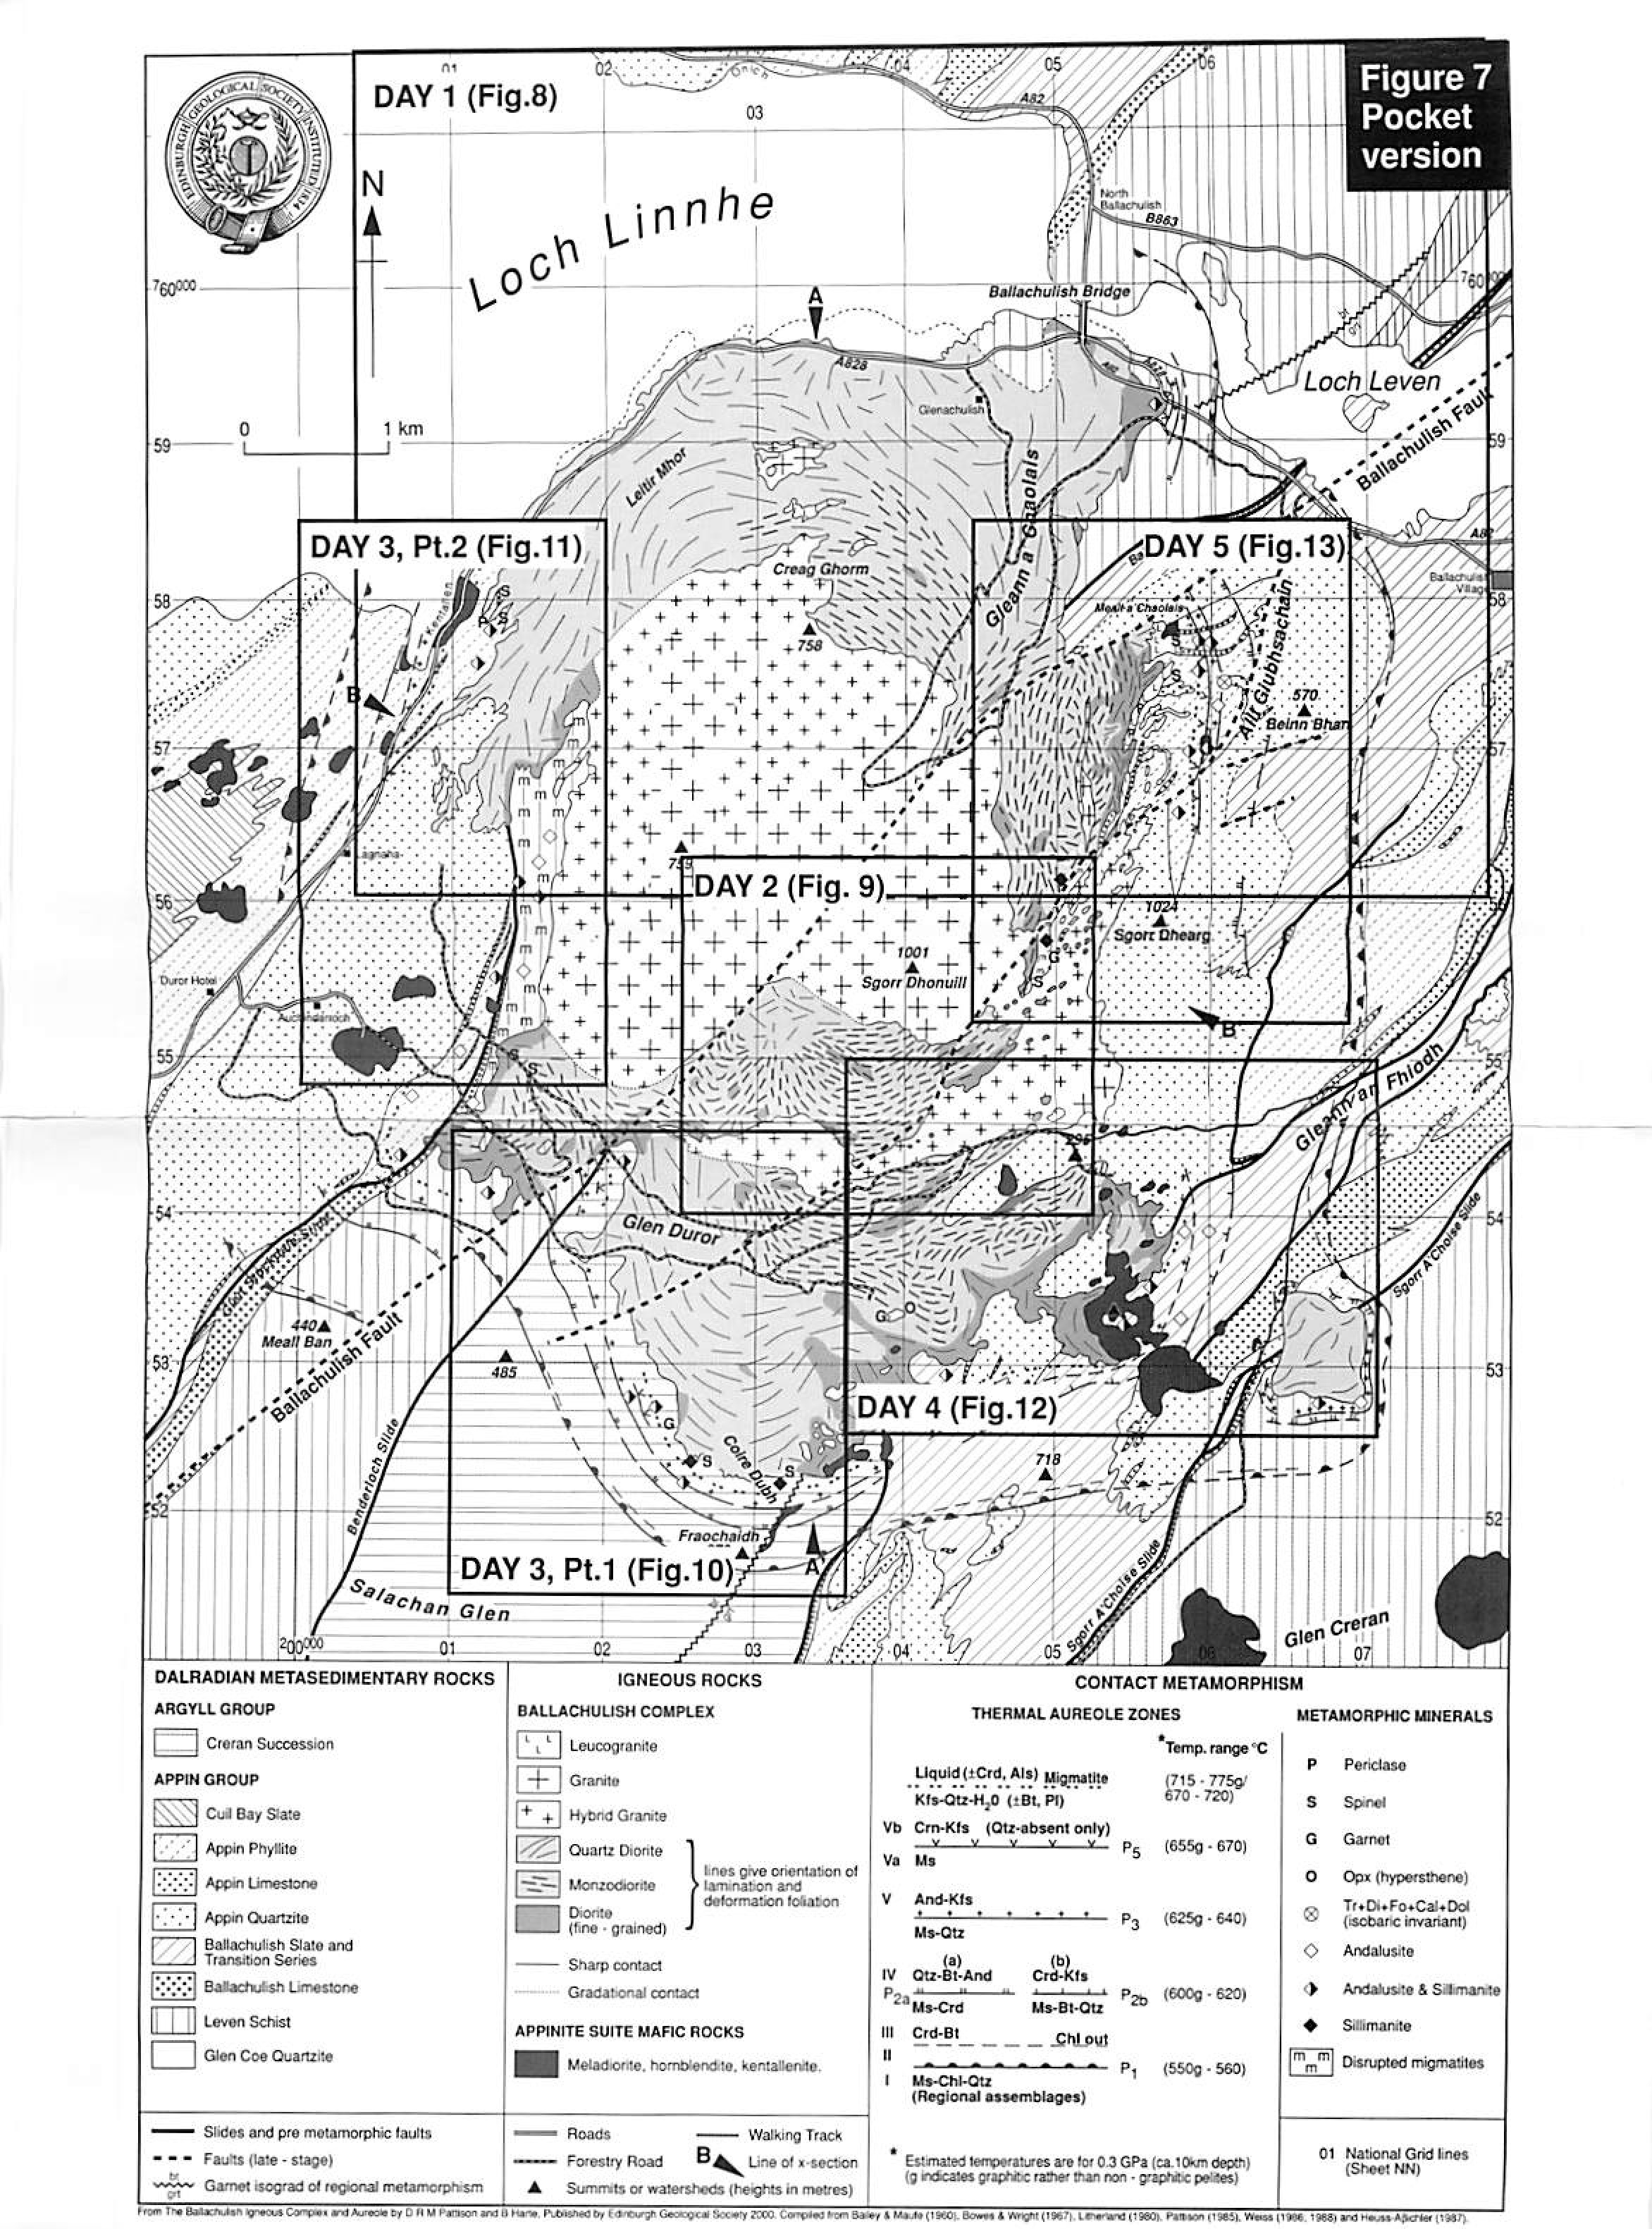
Geological map showing location of field stops for Day 2, see | Geological map showing location of field stops for Day 2, see [[Media:EGS Ballachulish Fig 07.jpg]] for key to geological map). See Fig.10 for Stop 2 -1. | ||
Figure 9: (a) From: Pattison, D.R.M. and Harte, B. The Ballachulish Igneous Complex and aureole: a field guide. Edinburgh : Edinburgh Geological Society, 2001. | Figure 9: (a) From: Pattison, D.R.M. and Harte, B. The Ballachulish Igneous Complex and aureole: a field guide. Edinburgh : Edinburgh Geological Society, 2001. | ||
| Line 10: | Line 12: | ||
| This image is Copyright Edinburgh Geological Society. The images may be reproduced free of charge for any non-commercial use in any format or medium provided they are reproduced accurately and not used in a misleading or derogatory context. Where any images on this site are being republished or copied to others, the source of the material must be identified and the copyright status acknowledged. For all other uses of the images please contact the Edinburgh Geological Society. [mailto:publications@edinburghgeolsoc.org publications@edinburghgeolsoc.org] | | This image is Copyright Edinburgh Geological Society. The images may be reproduced free of charge for any non-commercial use in any format or medium provided they are reproduced accurately and not used in a misleading or derogatory context. Where any images on this site are being republished or copied to others, the source of the material must be identified and the copyright status acknowledged. For all other uses of the images please contact the Edinburgh Geological Society. [mailto:publications@edinburghgeolsoc.org publications@edinburghgeolsoc.org] | ||
|} | |} | ||
[[Category:License tags]] | [[Category:License tags]] | ||
Latest revision as of 21:41, 1 November 2015
Summary
Geological map showing location of field stops for Day 2, see Media:EGS Ballachulish Fig 07.jpg for key to geological map). See Fig.10 for Stop 2 -1.
Figure 9: (a) From: Pattison, D.R.M. and Harte, B. The Ballachulish Igneous Complex and aureole: a field guide. Edinburgh : Edinburgh Geological Society, 2001.
Licencing
| This image is Copyright Edinburgh Geological Society. The images may be reproduced free of charge for any non-commercial use in any format or medium provided they are reproduced accurately and not used in a misleading or derogatory context. Where any images on this site are being republished or copied to others, the source of the material must be identified and the copyright status acknowledged. For all other uses of the images please contact the Edinburgh Geological Society. publications@edinburghgeolsoc.org |
File history
Click on a date/time to view the file as it appeared at that time.
| Date/Time | Thumbnail | Dimensions | User | Comment | |
|---|---|---|---|---|---|
| current | 21:32, 1 November 2015 | 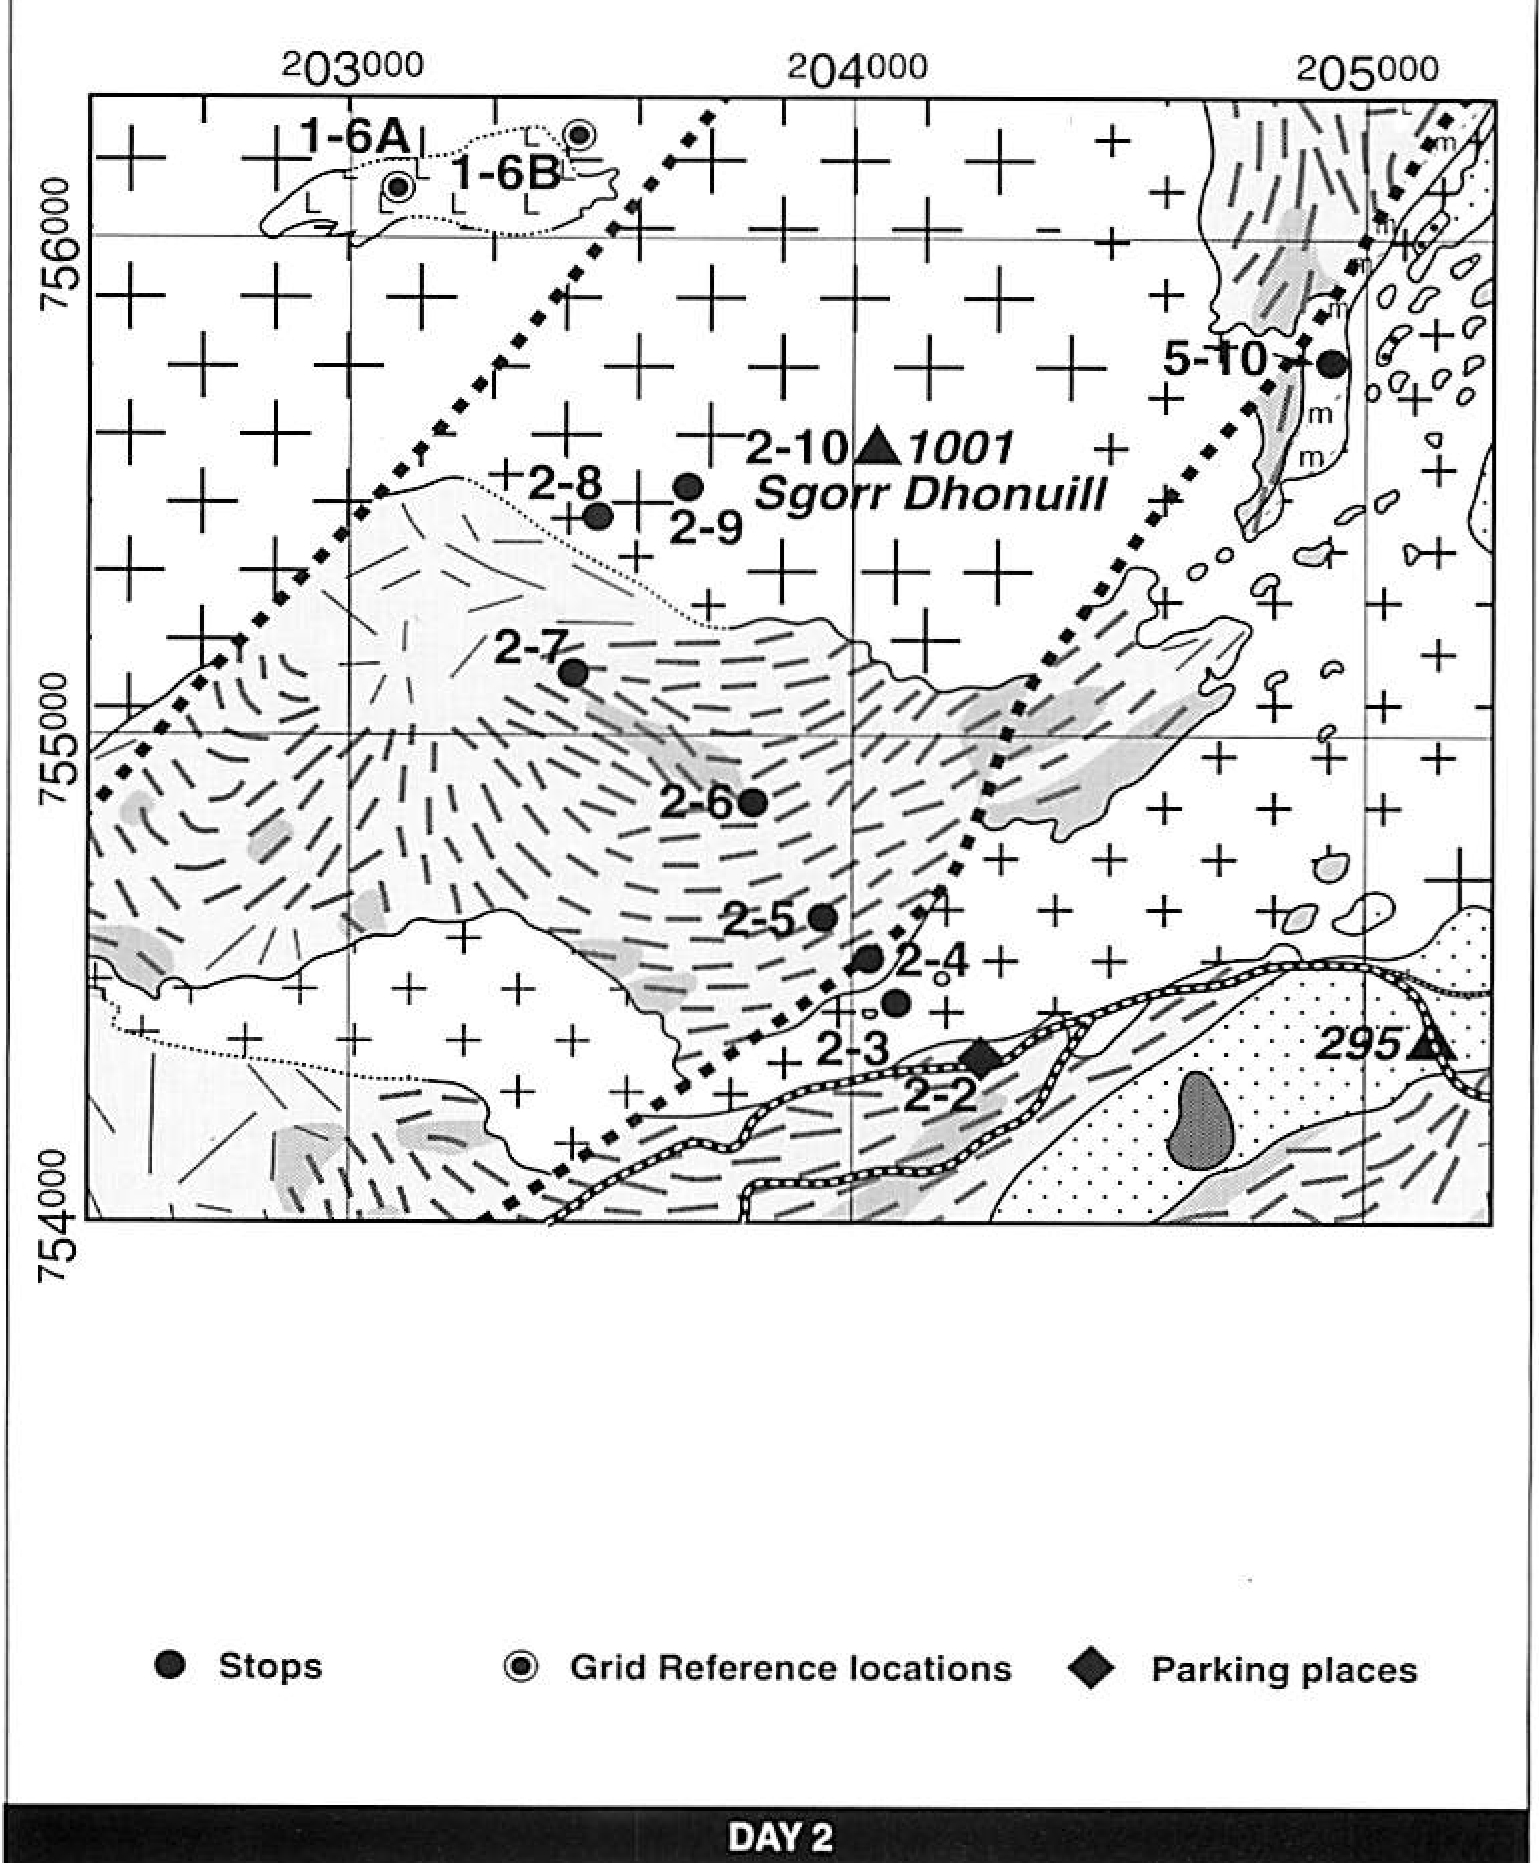 | 1,539 × 1,863 (1,014 KB) | Scotfot (talk | contribs) | Geological map showing location of field stops for Day 2, see Fig. 7 for key to geological map). See Fig.10 for Stop 2 -1. Figure 9: (a) From: Pattison, D.R.M. and Harte, B. The Ballachulish Igneous Complex and aureole: a field guide. Edinburgh : Edin... |
You cannot overwrite this file.
File usage
The following page uses this file: